I love shrimp. It’s incredibly versatile, cooks up in minutes, and lends itself to endless flavor combinations. But, like many of us, I sometimes end up with leftover cooked shrimp.
The good news is, those tasty little morsels don’t need to go to waste! With a pinch of creativity, you can repurpose leftover shrimp into a whole range of exciting and satisfying dishes.
[toc]
Key Takeaways
- Leftover shrimp is a budget-friendly and time-saving ingredient.
- Properly stored, cooked shrimp lasts for up to 3 days in the refrigerator.
- Shrimp can be transformed into countless delicious meals across different cuisines.
- You can get creative with appetizers, main courses, and unique dishes.
The Wonders of Using Leftover Shrimp
Let’s talk about why you should be excited about leftover shrimp:
- Saves money: Instead of buying new shrimp for each recipe, you make your food budget go the extra mile.
- Reduces prep time: Your shrimp is already cooked! That’s a huge time saver for busy weeknight meals.
- Pure convenience: Having pre-cooked shrimp means you always have a flavorful protein on hand.
- Adds deliciousness: Shrimp brings a rich, savory element to everything, from stir-fries to salads.
Storing and Reheating Leftover Shrimp: The Essentials
To ensure your leftovers are safe and ready to use:
- Fast chilling: Cooked shrimp needs to get into the refrigerator within two hours to prevent bacteria growth.
- Proper storage: Use airtight containers or sealable bags to maintain freshness and prevent odors from seeping in.
- Eat within 3 days: For the best flavor and texture.
- Reheat gently: Overcooking can cause shrimp to become tough. A quick stir-fry, adding to hot sauces, or a short warming in the oven usually does the trick.
Global Adventures with Leftover Shrimp
| Cuisine Type | Popular Dishes | Recipe Notes |
|---|---|---|
| Asian | Shrimp fried rice, shrimp stir-fries, shrimp pad thai, shrimp noodle soups | Bold sauces, fresh ginger and garlic, crunchy vegetables |
| Mediterranean | Shrimp pasta with garlic and olive oil, shrimp scampi, shrimp risotto, shrimp salads | Lemon, white wine, fresh herbs, ripe tomatoes |
| Mexican | Shrimp tacos, shrimp fajitas, shrimp quesadillas, shrimp ceviche | Zesty lime, cilantro, avocado, jalapenos for a kick |
| Cajun/Creole | Shrimp gumbo, shrimp jambalaya, shrimp étouffée | Rich, flavorful broths, the ‘holy trinity’ of vegetables (onion, celery, bell pepper), smoky spices |
Leftover Shrimp Appetizers and Snacks
Need a quick bite or a party spread? Leftover shrimp is here to help:
Shrimp dip

What You’ll Need: The Essentials
- Cream cheese: This is the creamy base, so use full-fat, softened cream cheese for the best results. Think about 8 ounces.
- Mayonnaise: A little mayo adds richness and helps thin the dip. ¼ cup is usually enough.
- Lemon juice: It’s like a magic wand for seafood, cutting through the richness and adding a bright zip. Start with a couple tablespoons.
- Shrimp: The star of the show! You’ll need around ¾ pound of cooked, small shrimp. You can buy them pre-cooked or cook them yourself.
- Seasonings: Essentials include salt, black pepper, a touch of hot sauce, and some fresh herbs (dill or parsley are my go-to).
Let’s Get Cooking!
- Creamy base: Start by beating the softened cream cheese and mayo until light and fluffy. That’s where a hand mixer comes in handy, but you can definitely muscle through it with a regular whisk!
- Zesty touch: Stir in the lemon juice, along with a pinch of salt, pepper, and a dash of hot sauce for a little kick (if you like things spicy!)
- Shrimp time: Give your shrimp a rough chop – you want them in bite-sized pieces, not a mush. Then, fold those little guys into the creamy mixture.
- Taste and adjust: This is crucial! Have a taste and see if you need more lemon, salt, or herbs.
Serving Tips
Chill your dip for at least an hour to let the flavors mingle. Serve it up with all the good stuff:
- Crackers of all shapes and sizes
- Sliced veggies like carrots, cucumbers, or bell peppers
- Crusty bread for scooping
Make it Your Own
This is just a base recipe! Here are some ideas to get the creative juices flowing:
- Spice it up: Add a pinch of cayenne pepper, smoked paprika, or Old Bay seasoning.
- Cheese, please: A handful of shredded cheddar or a sprinkle of Parmesan adds another layer of deliciousness.
- Herbs galore: Use your favorites like chives, basil, or tarragon.
Honestly, shrimp dip is one of those super forgiving recipes. Experiment, find your favorites, and most importantly, enjoy the process!
Shrimp salad sandwiches
I love a good shrimp salad sandwich! It’s that perfect combo of savory, creamy, and a touch of freshness – the kind of lunch that always hits the spot. Let me walk you through how I whip up this classic with a few of my own tasty twists:

The Ingredients: What You’ll Need
- Shrimp: The star of the show, and you’ll want about 1 pound. You can cook them yourself (boiling or sauteing with a bit of seasoning), or grab them pre-cooked to save time.
- Celery: Adds that satisfying crunch! I usually go for 2-3 stalks, finely diced.
- Mayo: The creamy binder, and about ½ cup should do the trick.
- Herbs: Fresh dill or parsley make a huge difference. Start with a tablespoon or two, chopped.
- Lemon juice: A tablespoon for a zesty zing.
- Salt & Pepper: Absolute essentials – season to taste!
- Bread: Your favorite kind for the sandwich base.
Step by Step: From Shrimp to Sandwich
- Prep the shrimp: If you’re cooking them raw, give them a quick boil or sauté until just pink. Let them cool completely, then give them a rough chop. You want chunky pieces, not mush.
- Mix it up: In a bowl, combine your shrimp, celery, mayo, herbs, lemon juice, and a pinch of salt and pepper. Give it a good stir.
- Taste test: This is crucial! Adjust with more lemon, herbs, or seasoning to your liking.
- Chill out: Cover and refrigerate for at least 30 minutes so those flavors can mingle. This makes a huge difference!
- Assemble: Toast your bread if you like. Butter it up for extra richness. Then pile on a generous scoop of your chilled shrimp salad.
The Perfect Bite
A classic shrimp salad sandwich is pure deliciousness, but here are some ideas to make it next-level:
- Swap the bread: Try a croissant for a touch of flakiness or a lettuce wrap for a lighter option.
- Greens galore: Add some leafy greens like arugula for a peppery bite.
- Tomato time: A juicy slice of tomato adds freshness.
The best thing about a shrimp salad sandwich is how forgiving it is. Go crazy with your own favorite ingredients, and most importantly, have fun with those flavors!
Shrimp lettuce wraps

Lettuce wraps are a fantastic way to enjoy a light and flavorful meal, and they’re especially perfect with shrimp! Here’s how I like to make a shrimp lettuce wrap that’s packed with flavor and healthy goodness:
Gather Your Ingredients:
- Shrimp: The star of the show! Aim for about 1 pound of medium or large raw shrimp, peeled and deveined.
- Lettuce: Choose sturdy leaves that can hold your filling. Butter lettuce, romaine, or even iceberg work well.
- Veggies: Get creative! Thinly sliced bell peppers, shredded carrots, and cucumbers add crunch. Sliced avocado? Even better!
- The Sauce: This is where the magic happens. I use a simple mix of soy sauce (2 tablespoons), rice vinegar (1 tablespoon), a drizzle of sesame oil, a bit of grated ginger, and a pinch of red pepper flakes for a kick.
- Garnishes: Fresh cilantro, chopped peanuts, and a squeeze of lime are the perfect finishing touches.
Let’s Get Cooking!
- The Shrimp: Sauté your shrimp in a hot skillet with a touch of oil. Season lightly with salt and pepper. Cook just until they turn pink – about 2-3 minutes per side. Don’t overcook them – you want them juicy!
- The Sauce: Whisk together your soy sauce, rice vinegar, sesame oil, ginger, and red pepper flakes.
- Assemble: Place a few shrimp on each lettuce leaf. Top with your favorite veggies. Drizzle with the sauce and add those garnishes. Time to get messy!
Tips for Success:
- Adjust the spice: Customize the heat level to your liking by adding more (or less) red pepper flakes.
- Make those veggies colorful: A mix of colors adds visual appeal. Think red bell peppers, a purple cabbage slaw, or even pickled radish for a pop of pink!
- Leftovers? No problem!: Your shrimp and veggie filling keeps well in the fridge, making it easy to whip up more wraps throughout the week.
Get Creative!
Shrimp lettuce wraps are incredibly versatile. Here are some ideas to get you started:
- Thai-inspired: Add a spoonful of peanut sauce and swap the cilantro for fresh mint.
- Spicy Korean: Toss the shrimp in a Korean gochujang marinade before cooking.
- Mediterranean-style: Swap the lettuce for warm pita bread, add a dollop of hummus, and a sprinkle of feta cheese.
Shrimp lettuce wraps are a fantastic way to whip up a quick, customizable, and healthy meal. The only limit is your imagination, so go ahead and create your ultimate shrimp wrap experience!
Shrimp cocktail
Shrimp cocktail is a timeless classic, the kind of appetizer that makes you feel a little bit fancy! The good news is, it’s incredibly simple to pull off at home. Let me show you the ropes:

What You Need:
- Shrimp: Aim for about 1 pound of large or jumbo shrimp. You can buy them pre-cooked, but if they’re raw, we’ll get them cooked in a jiffy.
- Cocktail sauce: Sure, you can grab a jar, but homemade is surprisingly easy! I always go with a mix of ketchup, horseradish (adjust for your heat preference!), lemon juice, Worcestershire sauce, and a bit of hot sauce.
- The essentials: Ice to keep your shrimp chilled, lemon wedges for garnish, and your favorite crackers or crusty bread.
Step by Step: From Sea to Cocktail
- Cook the shrimp: If you have raw shrimp, fill a pot with salted water and bring it to a roaring boil. Add your shrimp, give them a stir, and turn the heat off. Let them sit for about 3-5 minutes, until they’re bright pink and cooked through. Then drain and immediately chill them in an ice bath.
- Prep those shrimp: Peel and devein your shrimp if needed. Leave the tails on – it’s all part of that classic shrimp cocktail look!
- Make the sauce (if you’re going homemade): Simply whisk together your ingredients. Start with the base of ketchup and horseradish, then add lemon juice, Worcestershire sauce, and hot sauce to taste.
- Assemble: There are two ways to do this. You can either arrange your shrimp around a bowl of sauce for dipping, or drape a few shrimp over individual cocktail glasses with sauce in the center.
Tips for the Perfect Shrimp Cocktail
- Ice, ice, baby: Always serve your shrimp well-chilled, preferably on a bed of ice.
- Don’t skimp on the sauce: Make sure there’s plenty for dipping!
- Fresh garnishes: A lemon wedge is classic, but a sprig of parsley brightens things up.
Get Creative :
- DIY Spice Mix: If you’re cooking raw shrimp, toss them with a sprinkle of Old Bay seasoning or Cajun spice mix before boiling.
- Bloody Mary-Inspired: Kick the horseradish up a notch and add a splash of celery salt to your sauce for a fun twist.
Shrimp cocktail is one of those dishes that’s greater than the sum of its parts. Super simple, always elegant, and guaranteed to disappear fast!
Main Courses Starring Leftover Shrimp
Upgrade your dinners with these satisfying leftover shrimp ideas:
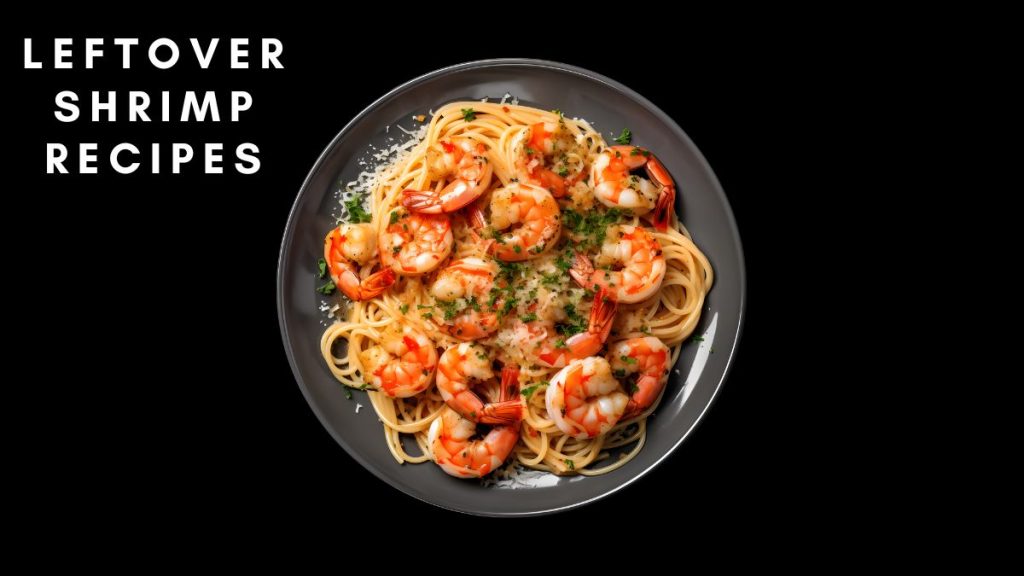
Shrimp Pasta
Cooking the perfect pasta is a skill every home cook should have in their arsenal! It’s the foundation for countless delicious meals, and honestly, there’s something so satisfying about a perfectly-cooked, al dente noodle. Let’s break down the simple steps you need for pasta perfection:

Your Pasta Toolkit:
- A big pot: Pasta needs room to dance! Use a pot with at least a 4-quart capacity.
- Salt: The number one way to flavor your pasta as it cooks. Use a generous tablespoon of salt per gallon of water. It should taste like the sea!
- Pasta: Choose your favorite shape. Long, short, it all works!
- Colander: For draining the pasta when it’s ready.
The Step-by-Step Guide
- Water Works: Fill your large pot with at least 4 quarts of water. Salt it generously and bring it to a roaring boil.
- Pasta In: Once the water is boiling, add your pasta. Give it a good stir to prevent sticking.
- Timing is Key: Refer to the package directions for cooking time. But the real secret? Start tasting your pasta about 1-2 minutes before the recommended time is up. Perfect al dente pasta should have a slight bite, not mushy, not crunchy.
- Save Some Water: Right before you drain the pasta, scoop out about a cup of that starchy, salty pasta water. This is liquid gold for creating silky sauces!
- Drain: Drain your pasta in the colander. Don’t rinse it! That starch helps your sauce cling beautifully to the noodles.
Pasta Pro Tips
- Don’t fear the salt: Salt transforms bland pasta into a flavorful base for your meal.
- Avoid overcooking: Mushy pasta is the enemy! Err on the side of slightly undercooked.
- Sauce match: Pair your pasta shape with the right sauce. Chunky sauces work best with sturdy pasta like rigatoni, while thin, delicate sauces pair beautifully with thin noodles like angel hair.
The Magic of Pasta
Perfectly cooked pasta is just the beginning. It’s a blank canvas for so many delicious sauces:
- Classic marinara: Bright and tomatoey
- Creamy Alfredo: Pure comfort food
- Pesto: Vibrant and flavorful
- Simple garlic and oil: With a sprinkle of Parmesan on top
With these simple tips, you’ll be a pasta master in no time! Remember, practice makes perfect, and there’s no greater reward than a plateful of delicious, homemade pasta.
Shrimp curry
Shrimp curry is one of my all-time favorite meals! With its vibrant spices, creamy sauce, and juicy shrimp, it’s a full-blown flavor explosion. Let me walk you through the steps and some tips to make a shrimp curry that’ll have you licking the bowl clean.

Gather Your Ingredients:
- Shrimp: About 1 pound of medium or large shrimp, peeled and deveined.
- The Aromatics: The heart of any good curry! You’ll need onion, garlic, and a thumb-sized piece of ginger, all finely chopped.
- Spices: The essentials are ground cumin, coriander, and turmeric. About a teaspoon of each. Add a pinch of chili powder for heat.
- Tomato base: You can use crushed tomatoes (about a 14-ounce can), chopped fresh tomatoes, or even tomato paste with a bit of water.
- Coconut milk: This creates that creamy richness. Full-fat is best! Use about 1 cup.
- The Extras: Fresh cilantro for garnish and a squeeze of lime at the end add a burst of freshness.
Let’s Get Cooking!
- Sauté time: Heat some oil in a large pot. Sauté your onions until softened, then add the garlic and ginger. Cook for another minute until fragrant.
- Spice it up: Add your spices and toast them for about 30 seconds, stirring constantly.
- Tomato base: Add your tomatoes of choice and bring the curry to a simmer. Cook down for about 5 minutes.
- Coconut goodness: Stir in your coconut milk, and a pinch of salt.
- Shrimp star: Gently add your shrimp and cook until just pink, about 3-5 minutes. Be careful not to overcook them!
- Garnish and serve: Sprinkle with fresh cilantro. A squeeze of lime adds some brightness. Serve over fluffy basmati rice or with your favorite naan bread.
Tips for the Best Shrimp Curry:
- Fresh spices: For the most intense flavor, grind whole spices yourself if possible.
- Make it your own: Adjust the spice level to your liking.
- Customize the additions: Toss in some veggies like bell peppers, spinach, or potatoes for a heartier curry.
- Don’t forget the rice: Basmati is the classic pairing, but brown rice or even cauliflower rice work too!
The Joy of Shrimp Curry
The best thing about shrimp curry is its versatility. There are endless variations—Thai-inspired with a splash of fish sauce and a hit of lime, Indian versions with a richer spice blend, and lighter, coconut-based variations. It’s your culinary adventure!
Don’t be afraid to experiment with different flavors and ingredients. Making the perfect shrimp curry is a journey, and the results are always incredibly delicious.
Soups and chowders

Soups and chowders are the ultimate cold-weather comfort food! There’s something so soul-warming about a steaming bowl of flavorful goodness. Let me walk you through the basics of making delicious soups and chowders at home:
Understanding the Difference
- Soup: Typically based on broth or stock, with a wide range of textures from thin and clear to thick and creamy. Think tomato soup, chicken noodle, or French onion.
- Chowder: A thick, hearty soup often made with potatoes, seafood, or corn. Classic examples include clam chowder and corn chowder.
The Essential Building Blocks
- Aromatics: This is your flavor foundation! Onions, garlic, celery, and carrots are the classic combo.
- Broth or Stock: Chicken, beef, vegetable, or even seafood broth all work, depending on your recipe. Homemade is best, but good quality store-bought will also do the trick.
- Main Ingredients: This is where it gets fun! Chicken, beans, lentils, veggies, seafood, the possibilities are endless.
- Thickening Agents (Optional): For heartier soups, you can use flour, a roux (butter and flour mixture), pureed vegetables, or heavy cream.
Steps to Soup and Chowder Success
- Sauté those aromatics: Start by cooking your onions, garlic, and other aromatics in a bit of oil to soften them and release their flavors.
- Add your main ingredients: Brown any meat, sauté vegetables, or add beans.
- Pour in the broth: Add enough to cover your ingredients, plus a little extra.
- Season and simmer: Season with salt, pepper, and your favorite herbs and spices. Let your soup simmer until all the ingredients are tender and the flavors have melded together.
- Adjust the thickness (if needed): If you want a creamier soup, whisk in a little heavy cream or cornstarch slurry (cornstarch mixed with water). For a thicker chowder, try adding potatoes or a roux.
Tips and Tricks
- Taste as you go: This is the key to perfectly seasoned soups and chowders.
- Don’t overcook your veggies: You want them tender, not mushy.
- Use a variety of textures: This makes for a satisfying and interesting bowl of soup.
- Garnish for extra oomph: Fresh herbs, a dollop of sour cream, a swirl of olive oil, or a sprinkle of cheese can elevate a simple soup.
The Beauty of Soups and Chowders
The best part about soups and chowders is their versatility. You can use up leftover ingredients, make a big batch to freeze for later, and customize them endlessly to suit your taste. Don’t be afraid to experiment! Once you master the basics, the possibilities are truly endless.
Shrimp pizza
Shrimp pizza? You bet! It might sound a little unconventional, but trust me, it’s a flavor combination that works surprisingly well. Let me show you how I turn pizza night into a seafood extravaganza:

What You’ll Need: The Essentials
- Pizza dough: Homemade or store-bought. I usually keep a ball of frozen dough on hand for pizza emergencies!
- Pizza sauce: Your favorite jarred marinara or a simple mix of crushed tomatoes, olive oil, and Italian seasoning works just fine.
- Cheese: Mozzarella is a must, but a sprinkle of Parmesan adds a salty punch. Estimate about ½ cup mozzarella and a ¼ cup of Parmesan.
- Shrimp: About ½ pound of medium-sized shrimp, peeled, deveined, and pre-cooked for convenience. A quick sauté in garlic butter wouldn’t hurt though!
- Toppings (Optional): Sliced bell peppers, red onion, even some pineapple if you’re feeling adventurous!
Let’s Get Cooking!
- Prep your oven: Crank that heat up to 450°F (or even higher, if your oven allows!). A hot oven is key for a crispy crust.
- Stretch and sauce: Roll or stretch your pizza dough onto a baking sheet. Spread a thin layer of sauce.
- Cheese please! Sprinkle on your mozzarella, followed by a dusting of Parmesan.
- Shrimp time: Arrange your shrimp evenly on the pizza. Add any of those optional toppings now.
- Bake: Slide your pizza into the hot oven and bake for about 10-15 minutes, or until the crust is golden brown and the cheese is bubbly.
Tips for the Perfect Shrimp Pizza:
- Don’t overcrowd the pizza: Too many toppings can make your crust soggy.
- Keep an eye on the shrimp: They’re pre-cooked, so they just need to be heated through.
- Get creative with flavors: Try a pesto base instead of tomato sauce, or add a sprinkle of Cajun seasoning for a spicy kick.
The Joy of Shrimp Pizza
Shrimp pizza is a fun and unexpected addition to your pizza repertoire. It’s a great way to mix things up and enjoy the delicate sweetness of shrimp in a whole new way. Plus, who doesn’t love a good cheesy, crispy slice of pizza?
Creative and Unique Leftover Shrimp Recipes
Sometimes it’s fun to think outside the box. These unique ideas will put your leftover shrimp to delicious use:
Shrimp omelets or frittatas
I love a good omelet or frittata! They’re the perfect way to start the day or make a light and satisfying meal any time. Adding shrimp elevates them into something a little more special. Here’s how I make them:

The Ingredients (For 2 servings)
- Eggs: The foundation! I use about 4-6 large eggs.
- Shrimp: About ½ pound cooked small to medium shrimp. Give them a rough chop.
- Veggies (Optional): Chopped bell pepper, spinach, scallions…these add flavor and nutrition.
- Cheese (Optional): A sprinkle of cheddar, feta, or goat cheese gives it an extra layer of deliciousness.
- Flavor Boosters: Salt, pepper, fresh herbs (like dill or chives)
Omelet vs. Frittata: The Technique
- Omelet: For an omelet, you’ll whisk your eggs, add your fillings, and cook them over medium heat in a skillet. Flip halfway through for perfect, fluffy folds.
- Frittata: Similar to an omelet, but baked in the oven. Whisk your eggs and fillings, pour into a greased oven-safe skillet, and bake until set (about 15-20 minutes at 375°F).
Let’s Get Cooking (Omelet Style)
- Whisk it up: Beat your eggs with a good pinch of salt and pepper.
- Sauté: If using veggies, give them a quick sauté in a bit of butter or olive oil.
- Shrimp time: Add your shrimp and warm through.
- Cook your omelet: Pour the egg mixture into the hot skillet. As it sets, use a spatula to lift the edges, allowing the uncooked eggs to flow underneath.
- Fold and serve: When the omelet is mostly set but still a bit runny on top, add your cheese (if using). Fold the omelet in half.
Tips and Tricks
- Low and slow for omelets: This avoids overcooked, rubbery eggs.
- Pre-cooked shrimp: Saves time and keeps the omelet from getting watery.
- Fillings galore: Get creative! Leftover roasted veggies, different cheese varieties… the possibilities are endless.
Shrimp stuffed avocados
Shrimp stuffed avocados? Absolutely! This dish is a total flavor bomb – fresh, creamy, and bursting with vibrant flavors. It’s one of my favorite ways to enjoy avocados. Let’s dive in!

The Ingredients
- Avocados: Choose 2 large, ripe avocados. Hass avocados are perfect here.
- Shrimp: About ½ pound cooked small to medium shrimp, chopped.
- The Mix-Ins: Diced red onion (about ¼ cup), finely chopped cilantro, and diced tomato add freshness and zip.
- Dressing: Lime juice (start with 2 tablespoons), olive oil, salt, pepper, and a pinch of cumin for a flavor boost.
- Optional: For a little kick, add a pinch of chili powder or a splash of hot sauce to the dressing.
Assembling Your Masterpiece
- Prep the avocados: Carefully cut your avocados in half lengthwise. Remove the pits.
- Mix it up: In a bowl, combine your shrimp, onion, cilantro, tomatoes, and dressing. Toss gently to coat.
- Stuff and serve: Spoon the shrimp mixture generously into the avocado halves. Garnish with extra cilantro and a squeeze of lime, if you like.
Tips for the Perfect Shrimp Stuffed Avocados
- Ripe but firm: You want avocados that are ripe, but not too soft. This ensures they’ll hold their shape well.
- Make ahead: Prep the shrimp mixture in advance and store it in the refrigerator. Assemble right before serving.
- Customize it: Add other chopped vegetables like cucumber or bell peppers. Crumbled feta cheese would be a delicious addition.
Why I Love Shrimp Stuffed Avocados
This recipe hits all the right notes – it’s healthy, flavorful, and incredibly satisfying. Plus, it’s incredibly easy to throw together with a few simple ingredients. It’s the perfect light lunch, a refreshing appetizer, or even a summery side dish.
Shrimp cakes
I love a good shrimp cake! Crispy on the outside, tender and flavorful on the inside, they’re the perfect way to enjoy shrimp with a fun and tasty twist. Here’s how I transform simple ingredients into those craveable little patties:

The Ingredients: The Essentials
- Shrimp: About 1 pound of medium shrimp, peeled, deveined, and finely chopped. Don’t overprocess them – you want some texture!
- Binders: You’ll need an egg and about ½ cup of panko breadcrumbs to hold everything together.
- Flavor Boosters: Diced green onions, chopped fresh herbs (dill, parsley, or a mix), lemon zest, a pinch of cayenne pepper for a little kick, and salt and pepper to taste.
Let’s Get Cooking!
- Mix it up: In a large bowl, combine your chopped shrimp, egg, panko, green onions, herbs, lemon zest, spices, and a good pinch of salt and pepper. Mix gently until just combined – don’t overwork it.
- Form and chill: Shape the mixture into patties (about 6-8). Pop them in the refrigerator for at least 30 minutes to help them firm up.
- Pan-fry time: Heat a generous drizzle of olive oil in a large skillet over medium heat. Add the shrimp cakes and cook for about 3-4 minutes per side, or until golden brown and cooked through.
Tips for the Perfect Shrimp Cakes
- Don’t skip the chill: Chilling helps the patties hold their shape during cooking.
- Use a light hand: Gently mix the ingredients to avoid tough shrimp cakes.
- The sizzle test: If you don’t hear a good sizzle when the patties hit the pan, your oil isn’t hot enough.
- Serve with a sauce: A remoulade sauce, a spicy mayo, or even a simple yogurt dip are all delicious options.
Why I Love Shrimp Cakes
Shrimp cakes are so versatile! They’re perfect as an appetizer, a light lunch served on a salad, or even tucked into a bun for a satisfying sandwich. The best part is that they’re deceptively simple to make but feel like a special treat every time.
Shrimp quesadillas
Shrimp quesadillas? Sign me up! They’re the perfect combination of crispy, cheesy goodness and savory-sweet shrimp. Let me show you how easy it is to whip up this tasty treat:

What You’ll Need:
- Tortillas: Use medium or large flour tortillas. They fold easily and get beautifully golden when cooked. I usually use 4 tortillas.
- Shrimp: About ½ pound cooked small to medium shrimp. Give them a rough chop if they’re too big.
- Cheese, please! About 2 cups of shredded cheese. Mexican blend, Monterey Jack, or cheddar all work well.
- Flavor Boosters: Diced onion, bell peppers, a jalapeño for a kick (optional), a sprinkle of cumin, and salt and pepper to taste.
- Dipping Essentials: Salsa, sour cream, and guacamole are my go-to accompaniments.
Let’s Get Cooking!
- Sauté: Heat a bit of oil in a skillet. Sauté your onions and peppers until softened. Add the shrimp and your spices. Cook just to warm the shrimp through.
- Assemble: Place one tortilla on a clean surface. Sprinkle with cheese, top with the shrimp mixture, and add another generous sprinkle of cheese. Fold the tortilla in half to create a half-moon shape.
- Crisp it up: Heat a dry skillet over medium heat. Cook the quesadilla for about 2-3 minutes per side, or until golden brown and the cheese is melty. Repeat with remaining tortillas.
Tips for the Ultimate Shrimp Quesadillas:
- Warm tortillas: Microwaving your tortillas briefly makes them more pliable and less likely to tear.
- Don’t overfill: Overstuffed quesadillas are hard to flip!
- The cheese factor: Experiment with different cheeses. Crumbled queso fresco or a sprinkle of cotija cheese adds an authentic touch.
- Get creative: Add some chopped cilantro, corn kernels, or even crumbled chorizo sausage for an extra flavor punch.
The Joy of Shrimp Quesadillas
Shrimp quesadillas are the perfect crowd-pleaser! They’re quick, customizable, and cheesy goodness in every bite. Plus, who can resist the combination of savory shrimp and melty cheese? It’s a match made in culinary heaven!
Shrimp spring rolls
I love making shrimp spring rolls! They’re a super-fresh, satisfying, and surprisingly easy treat to make yourself. Here’s how I assemble these little rolls of deliciousness:

What You’ll Need: The Essentials
- Rice paper: Look for thin, round rice paper wrappers in the Asian section of your grocery store. Aim for 8-10 wrappers.
- Shrimp: About ½ pound cooked small to medium shrimp. Cut them in half lengthwise for easier rolling.
- Fillings: Think crunchy veggies and fresh herbs! Thinly sliced carrots, cucumbers, bell peppers, lettuce, cilantro, and mint are all delicious.
- Noodles (Optional): Cooked rice vermicelli noodles add a bit of softness.
- Sauce: A classic peanut dipping sauce is the perfect pairing.
Let’s Get Rolling!
- Prep your station: Assemble all your ingredients. Fill a shallow bowl or pie dish with warm water for dipping the rice paper.
- Soften the wrapper: Dip one rice paper wrapper into the water for just a few seconds. Lay it flat on a clean, damp towel.
- Layer it up: Start with a couple of lettuce leaves. Add a few shrimp halves, a sprinkle of your favorite veggies, a few sprigs of your chosen herbs, and a bit of noodles, if using.
- Roll like a pro: Fold the bottom of the wrapper over the filling. Fold in the sides, then roll it up tightly like a burrito. It gets easier with practice!
- Repeat and chill: Continue with the rest of your wrappers. Cover the finished rolls with a damp paper towel and chill before serving
Tips for Spring Roll Success
- Don’t oversoak: A very quick dip in the water is all you need.
- Work quickly: Once softened, rice paper can tear easily.
- Go light on fillings: Less is more! Overstuffed spring rolls are difficult to roll.
- Make your sauce: Whisk together peanut butter, soy sauce, lime juice, and Sriracha for an easy and delicious dipping sauce.
The Joy of Shrimp Spring Rolls
The best thing about spring rolls is their versatility. Switch up the veggies, add different herbs, or try grilling your shrimp for a smoky twist. Don’t be afraid to get creative!
They’re light, refreshing, and packed with flavor – the perfect healthy snack or appetizer that always impresses.
FAQs
Can I freeze leftover shrimp?
While technically safe, freezing cooked shrimp can affect its texture. It’s generally best to repurpose it within a few days of refrigerating.
How do I know if leftover shrimp is still good to eat?
Trust your senses! If it has a slimy texture, an unpleasant odor, or looks discolored, it’s past its prime.
Can I use leftover fried shrimp for other recipes?
Absolutely! Just be mindful that it already has some seasoning and may have absorbed oil. You might want to adjust your new recipe accordingly.
What are some super easy leftover shrimp recipes?
Toss into hot pasta with butter and garlic, add to a store-bought ramen for an upgrade, or mix into a salad with your favorite dressing.
Are there vegetarian/vegan alternatives for leftover shrimp recipes?
Tofu, tempeh, or plant-based shrimp substitutes can work well in many of the dishes mentioned.
Essential Recipe Tips
Here are some tips to ensure your leftover shrimp dishes turn out perfectly:
- Season to taste: Since your shrimp is already cooked, add salt and spices carefully towards the end of the cooking process.
- Avoid overcooking: Add shrimp right at the end to most dishes to prevent a rubbery texture.
- Consider dietary needs: Offer gluten-free pasta or tortillas, dairy-free sauces, and other substitutions when necessary.
- Presentation matters: Fresh garnishes like herbs, a squeeze of citrus, or a drizzle of sauce can elevate the experience.
Conclusion
As you’ve seen, leftover shrimp is a culinary treasure waiting to be discovered. From simple snacks to globally-inspired meals, a little leftover shrimp can take your cooking in countless exciting directions.
Don’t let those precious morsels go to waste! Embrace the resourcefulness of repurposing leftovers and enjoy the convenience of always having a delicious protein on hand.
Remember, a touch of creativity is the key to transforming leftover shrimp into truly satisfying dishes.
So, the next time you find yourself with leftover shrimp, consider it an invitation to experiment and have fun in the kitchen!


3 thoughts on “13 MIND-BLOWING Leftover Shrimp Recipe Makeovers”